

 Setting a newly purchased PresenceWeb™ website, step by step.
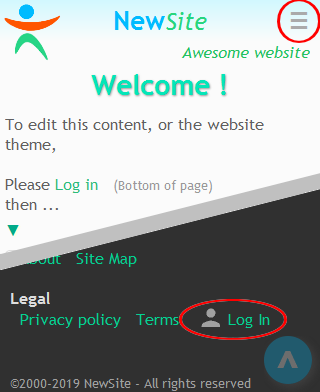
1 LOG IN
TAP the Menu button to Scroll down to the bottom of the page. Tap "Log In".
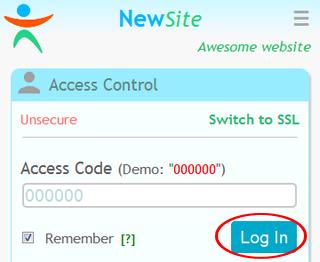
Enter your Access Code, Tap [Log In].
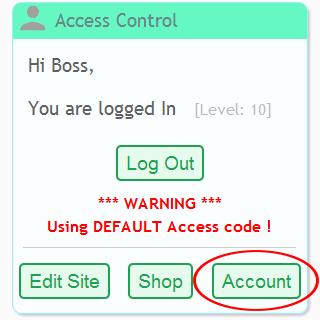
2 SECURE YOUR ACCOUNT
Tap [Account].
Set a Nick name, Access Code, Security question and answer.
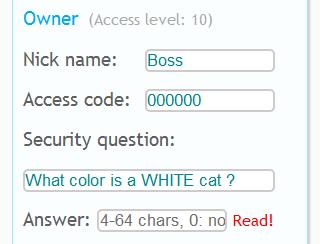
Write down all on a paper!
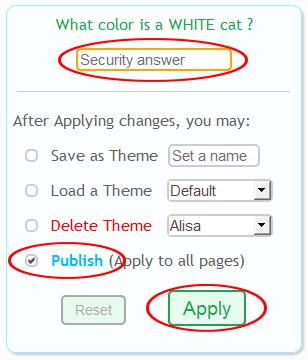
Enter the CURRENT security answer and Tap [Save]
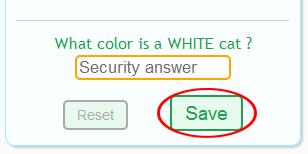
From now on use the NEW security answer
3 SET YOUR SITE
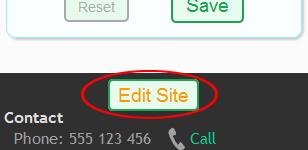
Tap [Edit Site].
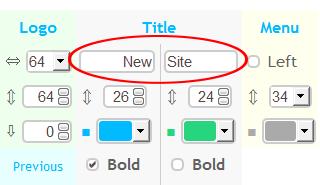
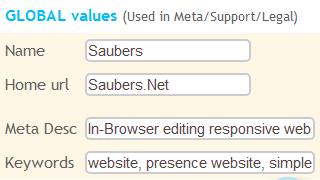
Set your Site Name.
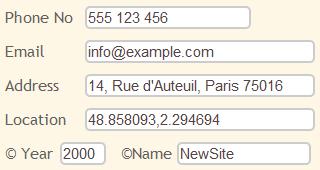
Set your contact info. Clear to not display.
Set your meta data for legal pages and search engines.
Enter your NEW security answer, Check "Publish" and Tap [Apply].
4 SET YOUR SECTIONS
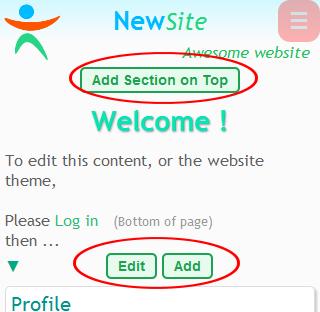
Tap on the Site Name or Logo to go to the Home page.

Tap an [Edit] button to modify or delete a section.
Tap an [Add] button to add a new section.
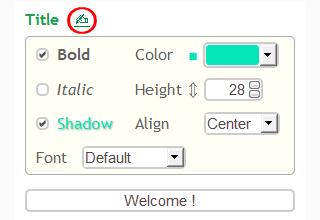
Tap this icon to edit text styles.
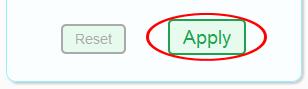
Once your done editing Tap [Apply] to check the results
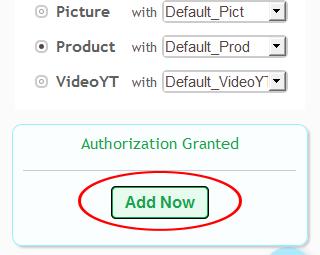
Or Tap [Add Now] if you added a section.
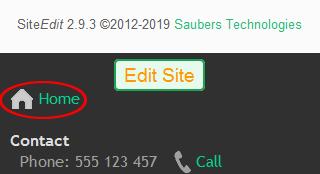
Tap on the Site Name or Logo to go back to the Home page.
If the Site Name and Logo are not clearly visible a Home icon will appear, Tap it.
That's it!
Just go back to any step to build your website.
Don't forget to Save your Sections & Themes so you may reload them later.